Shot Selection & Landing Zones
Final Boss Golf separates strike mechanics from strike decisions. You can skim the turf perfectly and still leave a tap-in—or blade it across the green—if you pick the wrong window. Shot Selection & Landing Zones is the decision engine: read the lie, read the green, choose carry versus rollout, and commit to a landing spot before the club moves.
Tactical routing on course: On-Course Tactics. Practice transfer for random lies: Course Management & Transfer.
This is the short-game parallel to Green Reading Algorithms. Carry Calibration supplies the distance code; this page supplies the targeting logic.
Aiming directly at the hole from a bad lie or with firm green conditions turns every wedge shot into a lottery. Elite short-game scoring attacks a landing zone and lets friction and slope finish the job.
The Decision Sequence
Before setup, run four reads in order:
- Lie read — what can bounce and release do from here?
- Green read — firm, soft, uphill, downhill, grain?
- Window selection — lob, checker, or bump-and-run?
- Landing spot — where on the ground should the ball first touch?
Only after those four locks does trajectory setup and carry Level get programmed.
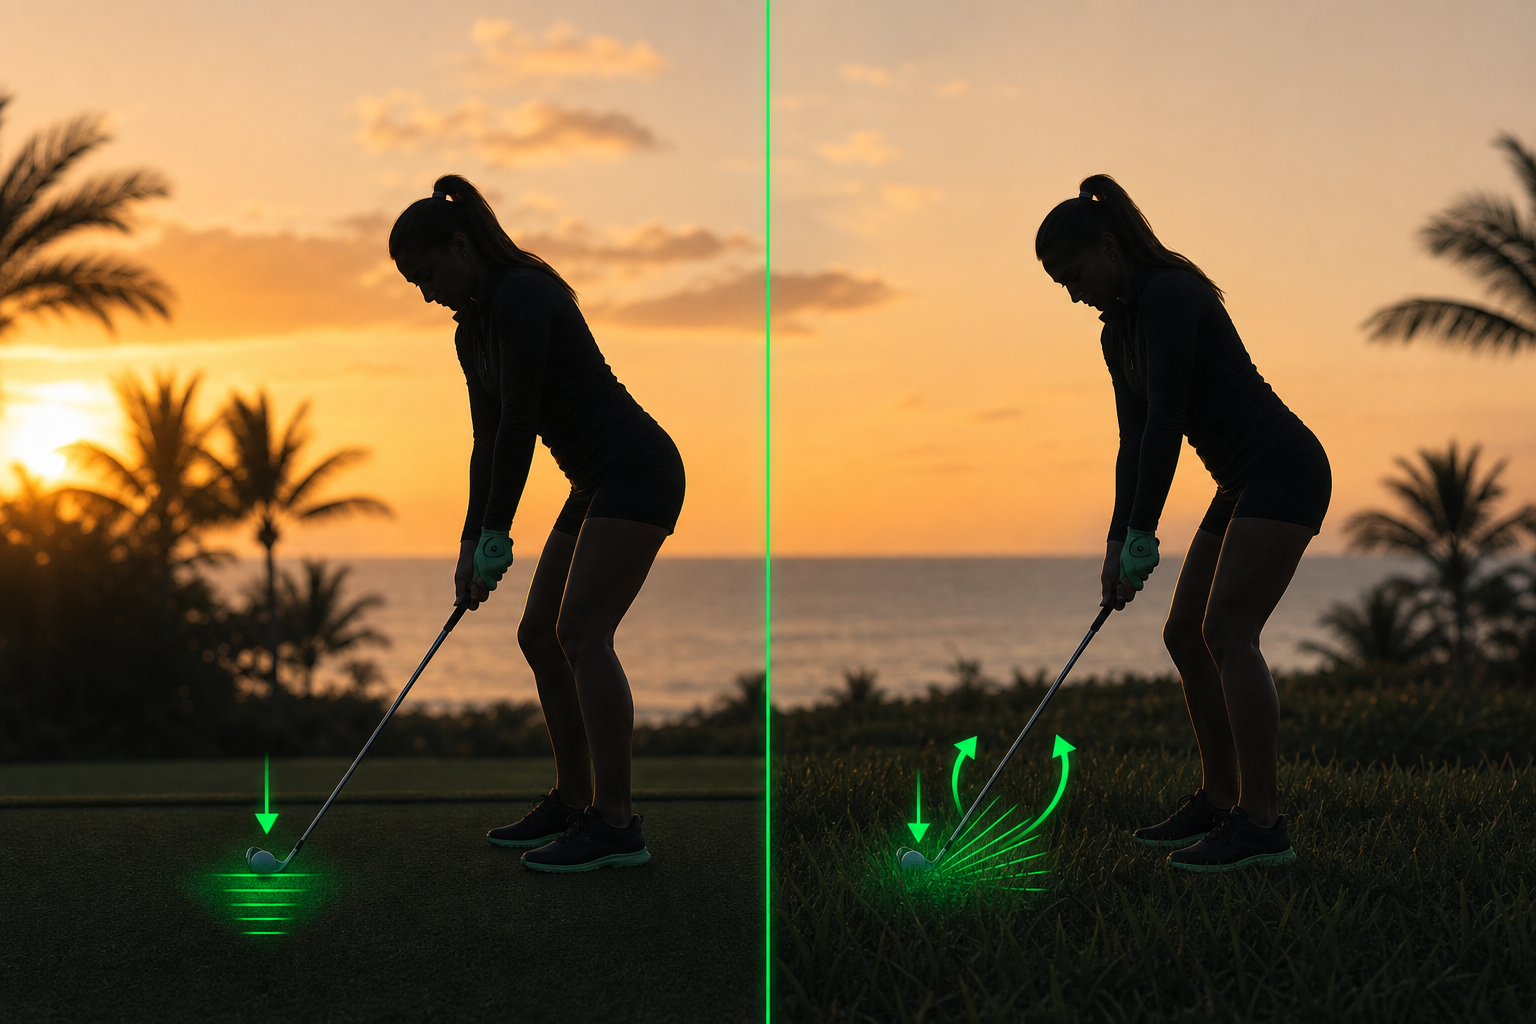
Step 1: Lie Read (Friction First)
The lie dictates whether bounce can work and how much speed survives impact.
| Lie | Primary risk | Tactical bias |
|---|---|---|
| Tight / fairway | Leading-edge dig | Neutral handle, shallow U-path, prioritize skid — Tight-Lie Chip |
| Fluffy / rough | Grass grabs the hosel, face twists closed | Structural lead-hand tension; higher loft; more carry, less rollout |
| Hardpan / wet | Bounce skips; blade risk | Lower trajectory; land short; expect extra release |
| Uphill / downhill | Low-point shift | Adjust hub tilt; expect less or more rollout respectively |
The same Level 2 carry swing from a tight lie and from fluffy rough produces different rollout—even when carry matches. Lie read must precede landing-spot math.
Step 2: Green Read (Release Prediction)
Once carry is calibrated, rollout is physics plus terrain:
- Firm, fast greens — expect more release; land farther short of the hole
- Soft, receptive greens — expect less release; carry can approach the pin more aggressively
- Downhill toward the hole — add release margin; land well short
- Uphill toward the hole — reduce release; carry can be more aggressive
- Grain (where present) — into-the-grain slows release; down-grain accelerates it
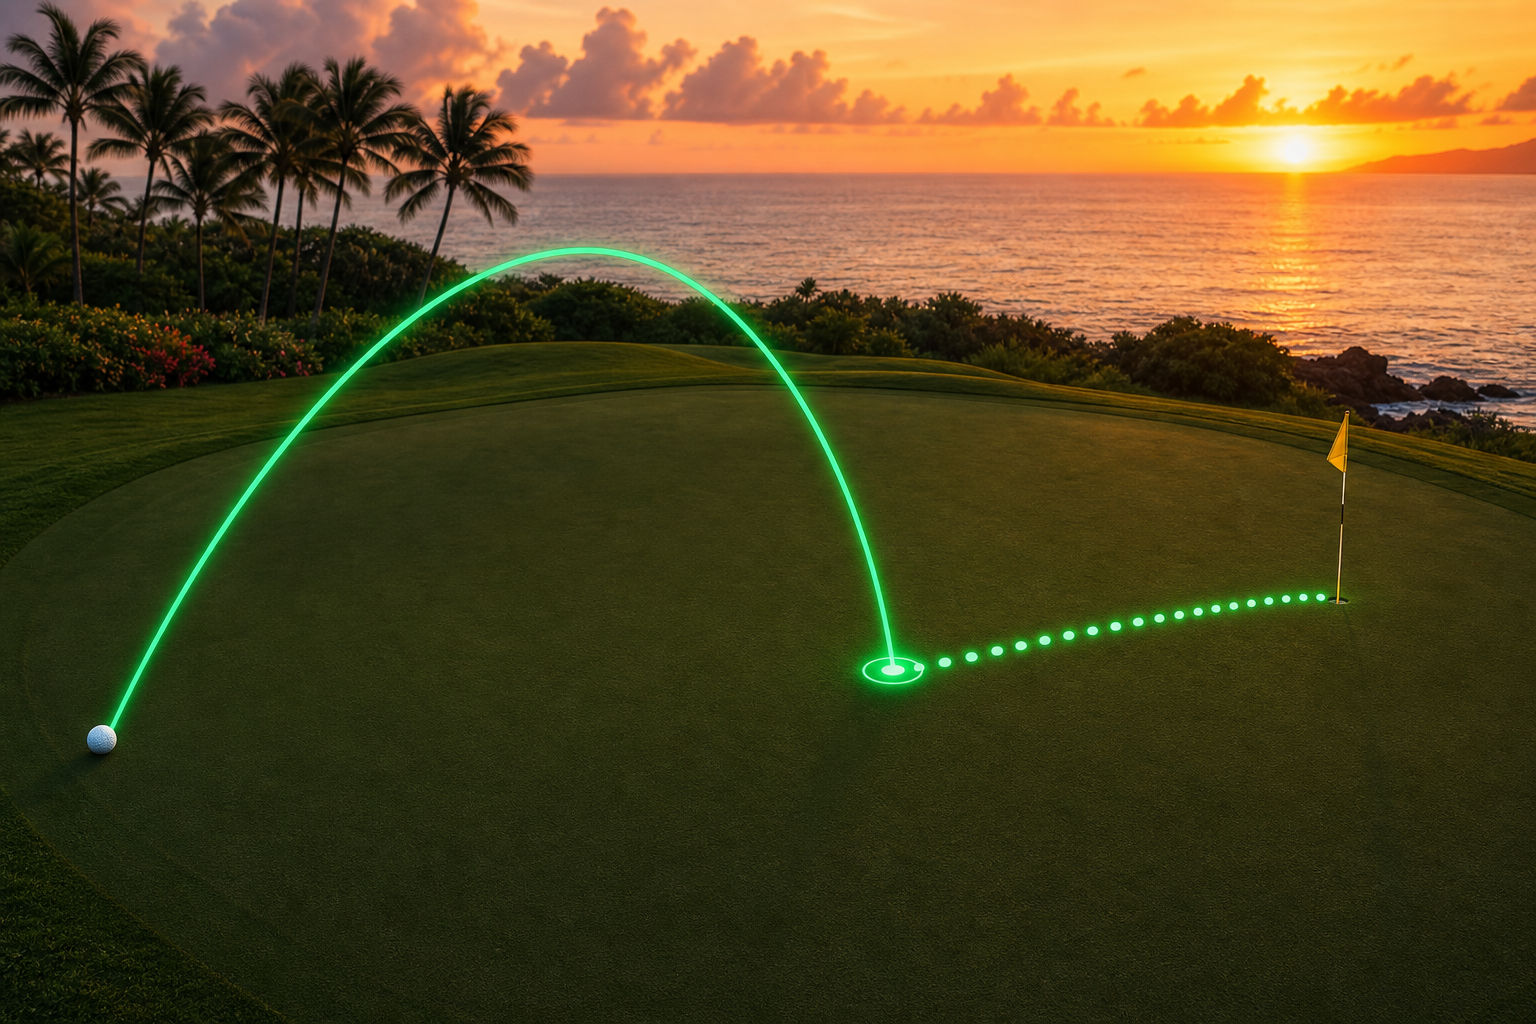
Program total distance as two segments: carry to landing spot + predicted rollout to the hole. If you only solve for carry, firm greens will always run through the pin.
Step 3: Window Selection (Lob vs. Checker vs. Bump)
Match the attack window to the environment—not to the shot you hit best on the range.
- Lob window — tight pin, little green, obstacle between ball and landing area; use forward ball + open face (Trajectory Control)
- Checker window — usable green, need spin and stop; back ball + square face + committed speed
- Bump-and-run window — plenty of green, firm surface, low friction risk; lowest loft, maximum rollout predictability — see Bump-and-Run
Tight fairway / hardpan before window selection: confirm Tight-Lie Chip skim mechanics or the window fails regardless of choice. Full routing: Short Game Shot Library.
When in doubt, choose the window with the largest margin for error, not the flashiest trajectory.

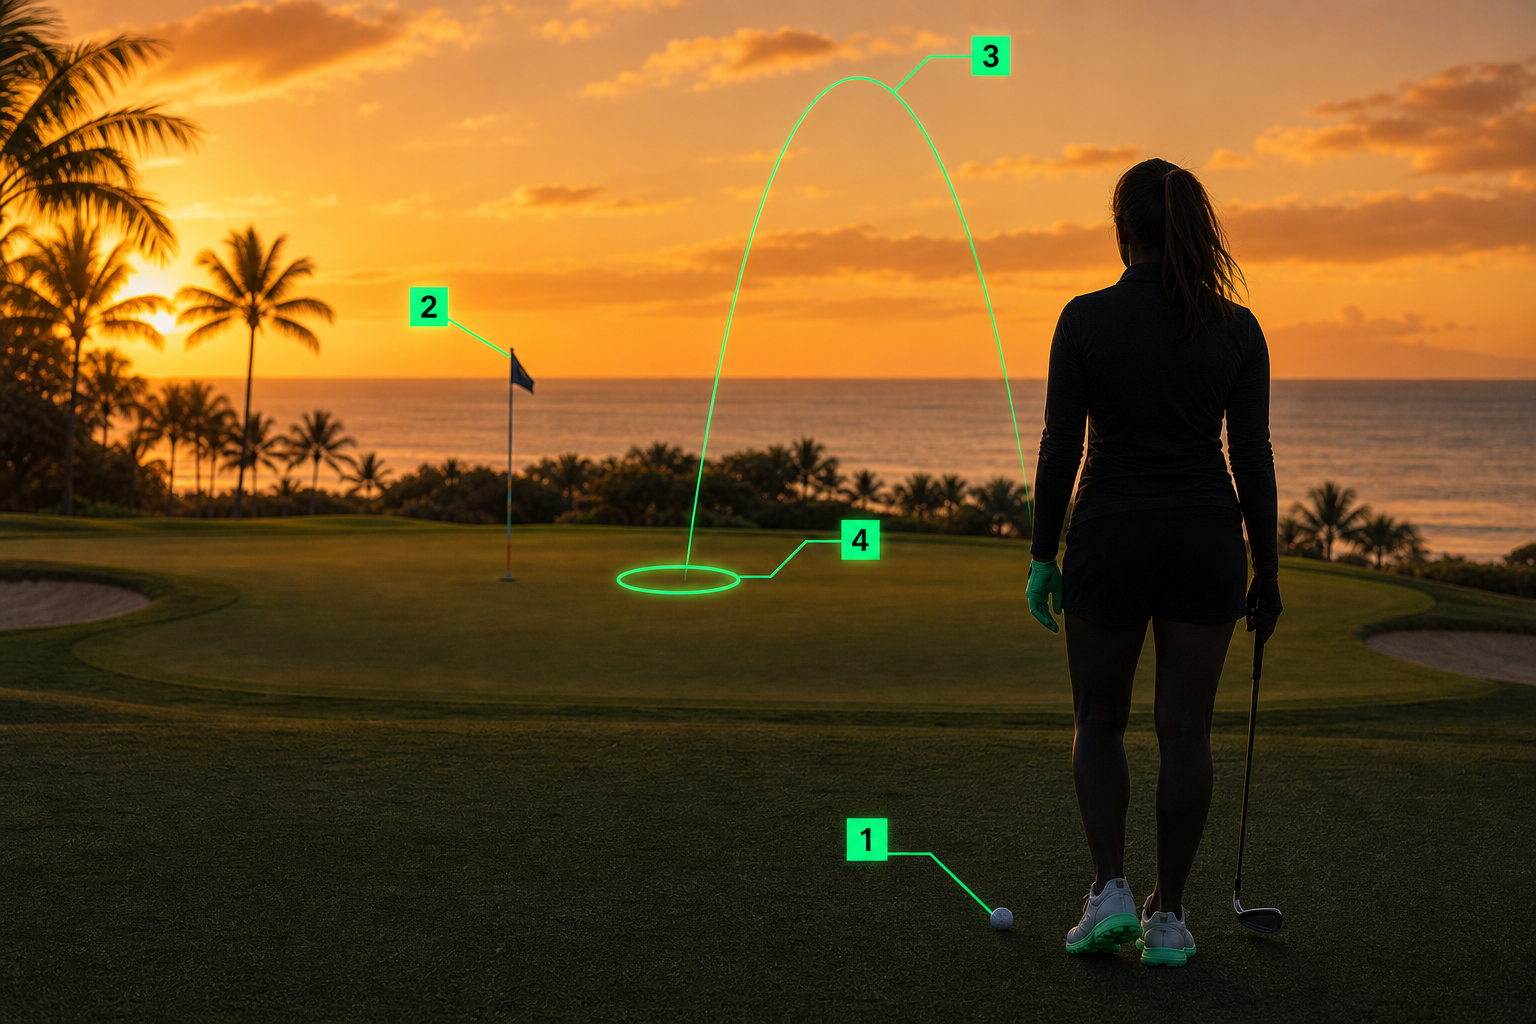
Step 4: Commit to the Landing Spot
The landing spot is a ground target, not the flag. Stand behind the ball and pick a precise patch of turf—or a intermediate mark on the green—where the ball should first touch down.
- The Mechanic: Call the window, estimate carry and rollout, reverse-engineer the landing spot from the hole location.
- The Output: Select Carry Level and trajectory setup to hit that spot—not the pin.
On course, integrate this into the Pre-Shot Loop: read lie and green behind the ball, lock landing spot, then build stance around the face.
External focus at execution should be the landing spot, not the hole. If carry matches the spot, a good read produces a good result—even when the hole is 20 feet away.
Bunker and Hazard Override
Greenside bunkers replace turf-first logic with sand displacement—but landing-zone thinking still applies. Pick where the ball exits the sand and lands on the green; calibrate explosion length separately from fairway carry levels.
Grooving This Pattern
Grooving this pattern
Shot Selection & Landing Zones
Delivery rule
decide before setup—lie, green, window, landing spot.
Work through the three steps below in order—don't skip ahead.
1. Learn It
~10% of your max · no ball
Stand behind each practice ball and verbalize all four reads before addressing—no club movement until landing spot is locked
decide before setup—lie, green, window, landing spot. — map geometry at checkpoints; no rush. After each rep: Window matches lie and green; landing spot is a ground target, not the flag
2. Prove It
~30–70% of your max · ball on
add a ball on the practice green.
Random lie draws—tight, fluffy, uphill, downhill; pick window and landing spot, then execute with mapped Carry Level (8 of 10 reps)
The Geometry of Bounce when tight lies dig; Trajectory Control when window selection is wrong for the pin location
3. Play It
Up to 100% of your max · game speed
game speed, new target/club/lie (or distance and break on putting), and the full Pre-Shot Loop when ready.
landing spot—not a body-part checklist
After a flag-hunt miss, reset behind the ball and rebuild all four reads before the next swing
If execution felt good but the result was wrong, the decision matrix failed—not the strike. Re-read lie and green; do not fix a good swing with a bad guess.
The Cheatcode for your Game